

Concrete is one of the most durable and versatile materials for residential construction, but residential concrete installation requires careful planning, quality materials, and experienced workmanship to achieve long-lasting results. Choosing the right contractor is just as important as selecting the right concrete mix. PurePour Concrete Inc. provides professional residential concrete installation services for homeowners throughout Kitchener, Waterloo, Cambridge, and Guelph.
Many homeowners only see the final surface. What they don’t see is the careful planning, excavation, grading, reinforcement, pouring, finishing, and curing that determine how well that concrete performs over the next 20 to 30 years.
If you live in Kitchener, Waterloo, Cambridge, or Guelph, your concrete must also withstand Ontario’s freeze-thaw cycles, heavy rainfall, snow removal equipment, and seasonal temperature changes. That’s why proper installation isn’t optional—it’s essential.
In this guide, we’ll walk through every stage of the residential concrete installation process, explain why each step matters, discuss common mistakes to avoid, and share practical insights that homeowners can use before hiring a contractor.
Featured Snippet
Residential concrete installation involves planning, excavation, grading, formwork, reinforcement, pouring, finishing, curing, and sealing. Each step plays a critical role in creating a durable concrete surface that can withstand weather, vehicle traffic, and decades of daily use, especially in climates like Southern Ontario.
Why Proper Residential Concrete Installation Matters
Concrete isn’t simply poured into a hole and left to dry.
Professional installation is a carefully managed process that combines engineering principles, site preparation, material selection, and finishing techniques to create a surface capable of handling years of use.
A properly installed concrete surface provides:
- Long service life
- Excellent load-bearing strength
- Better resistance to cracking
- Improved drainage
- Lower maintenance costs
- Greater property value
- Enhanced curb appeal
Poor installation, on the other hand, can lead to:
- Premature cracking
- Surface scaling
- Water pooling
- Frost heaving
- Uneven settlement
- Expensive repairs within just a few years
The installation process—not just the concrete mix—is often the biggest factor in long-term performance.
Understanding the Residential Concrete Installation Timeline
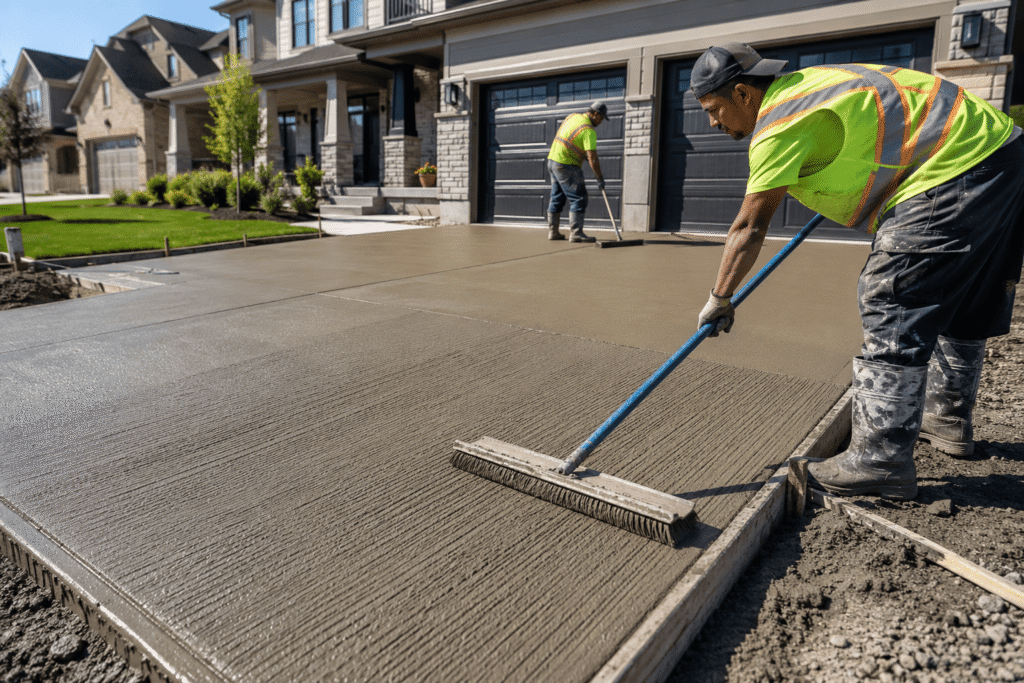
Every project is different, but most residential installations follow a similar sequence.
| Installation Stage | Typical Duration |
| Site Inspection & Planning | 1–2 days |
| Excavation & Base Preparation | 1 day |
| Form Installation | Same day |
| Reinforcement Placement | Same day |
| Concrete Pouring | Several hours |
| Surface Finishing | Same day |
| Initial Curing | 24–48 hours |
| Full Strength Development | Approximately 28 days |
Weather, project size, and site conditions may affect the schedule.
Step 1: Site Evaluation and Project Planning
Before any equipment arrives, professionals evaluate the site to determine whether the project is suitable for concrete installation.
This planning phase helps identify challenges that could affect durability later.
A contractor typically evaluates:
- Soil conditions
- Existing concrete
- Drainage patterns
- Property slope
- Vehicle traffic requirements
- Utility locations
- Municipal regulations
- Local building permit requirements
- Access for equipment
For homeowners in Kitchener, Waterloo, Cambridge, and Guelph, drainage receives special attention because standing water combined with freezing temperatures can shorten concrete life significantly.
Professional planning reduces surprises once construction begins.
Determining the Right Concrete Thickness
Not every residential project requires the same slab thickness.
The expected load determines how thick the concrete should be.
For example:
| Project | Typical Thickness |
| Walkways | Around 4 inches |
| Patios | Around 4 inches |
| Residential Driveways | 5–6 inches |
| Garage Floors | 5–6 inches or more depending on use |
Rather than using one thickness for every project, experienced contractors design the slab according to its intended purpose.
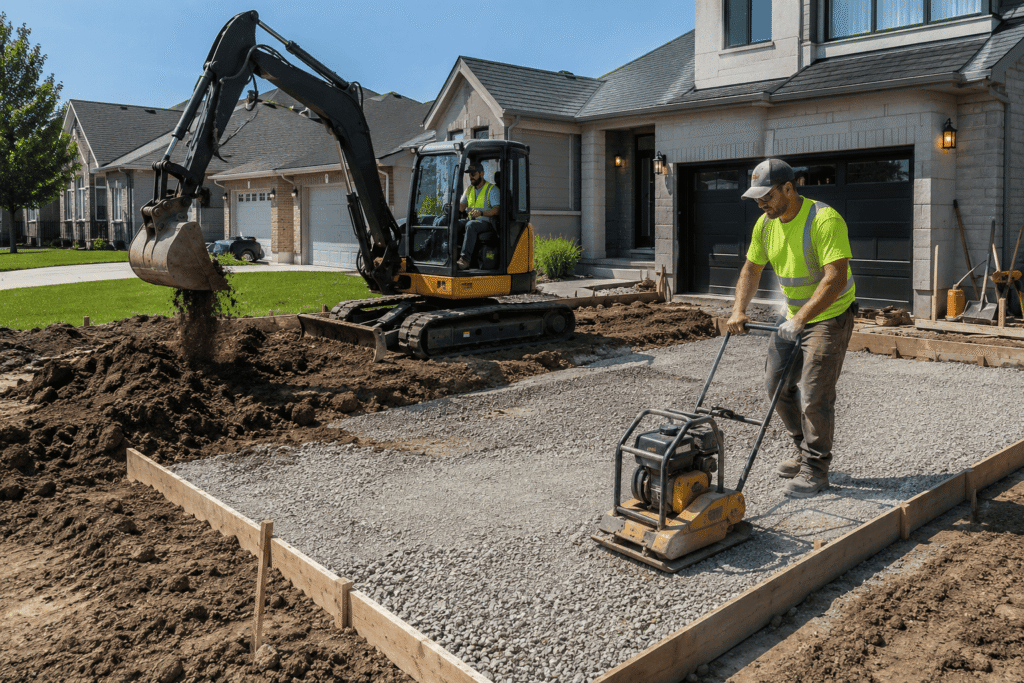
Step 2: Excavation and Removal of Existing Materials
Once planning is complete, excavation begins.
This step removes:
- Existing concrete
- Grass
- Organic soil
- Tree roots
- Loose materials
- Debris
Excavation creates room for the compacted base beneath the concrete.
Skipping proper excavation often causes future settlement because organic material decomposes over time, leaving empty spaces beneath the slab.
Professionals also shape the excavation to establish proper drainage before any concrete is poured.
Why Soil Quality Matters
Concrete is only as stable as the ground beneath it.
Weak or poorly compacted soil can shift over time, causing:
- Cracks
- Uneven slabs
- Sunken driveways
- Trip hazards
Different soil types behave differently throughout Ontario’s changing seasons.
Clay-rich soils, for example, expand when wet and shrink when dry, placing additional stress on concrete surfaces.
A knowledgeable contractor adjusts the base preparation according to local soil conditions instead of applying a one-size-fits-all approach.
Professional excavation lays the foundation for a successful project. Learn more about our Excavation Services and how proper site preparation improves long-term concrete performance.
Step 3: Building a Stable Gravel Base
The compacted gravel base is one of the most important parts of the entire installation process.
Although homeowners rarely see it after construction, it supports the slab throughout its lifespan.
A properly prepared base helps:
- Distribute loads evenly
- Improve drainage
- Reduce frost movement
- Minimize settlement
- Support heavy vehicles
Contractors generally install crushed stone or granular aggregate in layers before compacting it with specialized equipment.
Proper compaction is critical.
Even premium concrete can fail if the base beneath it isn’t adequately compacted.
Signs of a Properly Prepared Base
Before concrete is poured, a quality base should:
- Feel firm underfoot
- Be evenly compacted
- Maintain consistent depth
- Follow the planned slope
- Allow water to drain away from the home
These details significantly influence the finished slab’s long-term durability.
Step 4: Installing Forms to Shape the Concrete
Forms act as temporary molds that hold wet concrete in place until it hardens.
Professional contractors carefully position forms to establish:
- Final dimensions
- Elevation
- Edges
- Drainage slope
- Surface alignment
Accurate form placement helps produce clean edges, straight lines, and consistent thickness throughout the project.
Even small alignment errors at this stage become permanent once the concrete sets.
The Importance of Proper Slope
A professional residential concrete installation should rarely be perfectly level. Instead, experienced contractors create a slight slope to encourage proper water runoff and prevent moisture from collecting on the surface. Proper grading helps prevent:
- Water pooling
- Ice formation
- Foundation moisture issues
- Surface deterioration
This is particularly important in Southern Ontario, where snowmelt and seasonal rain can quickly expose drainage problems. Proper grading is one of the most important steps in a durable residential concrete installation, helping driveways, patios, walkways, and slabs perform better for years to come.
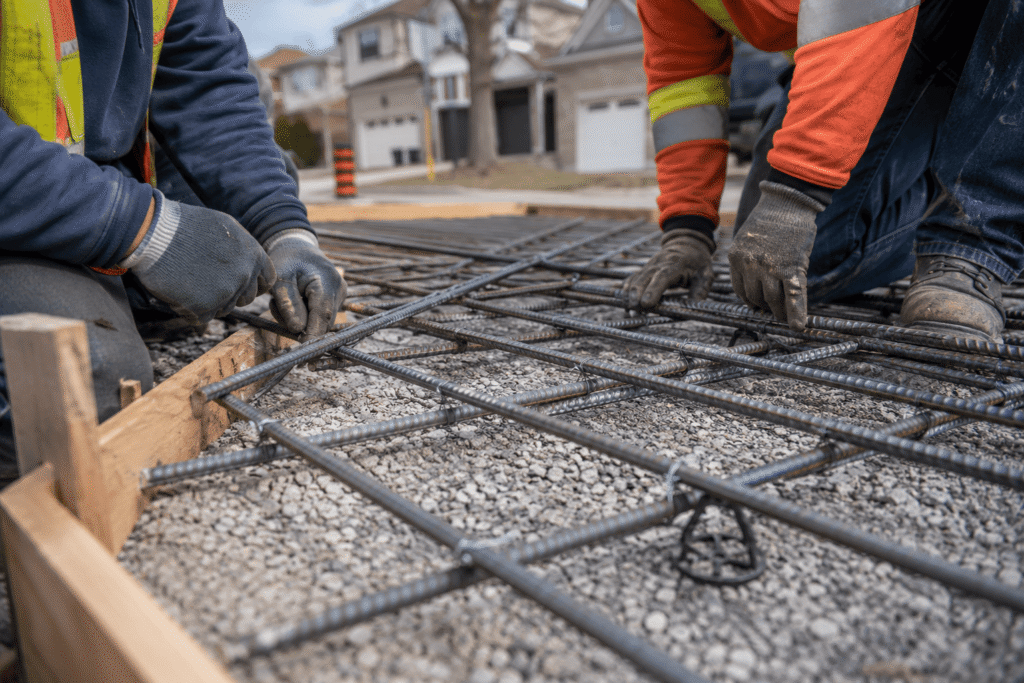
Step 5: Reinforcement for Added Strength
Although concrete has excellent compressive strength, it is weaker under tension.
That’s why reinforcement is often included during installation.
Depending on the project, contractors may use:
- Steel reinforcing bars (rebar)
- Welded wire mesh
- Synthetic fiber reinforcement
- Combination reinforcement systems
Reinforcement doesn’t eliminate cracking entirely. The American Concrete Institute (ACI) publishes widely recognized standards and best practices for concrete design, construction, and durability, making it a valuable resource for understanding professional concrete installation guidelines. Instead, it helps control crack width, improves structural performance, and allows the slab to carry loads more effectively over time.
Choosing the appropriate reinforcement depends on factors such as slab size, expected traffic, soil conditions, and local building requirements.
Why Reinforcement Is Especially Important for Driveways
Driveways experience repeated vehicle loads, seasonal temperature fluctuations, and freeze-thaw expansion.
Proper reinforcement helps:
- Improve structural stability
- Reduce crack movement
- Increase load distribution
- Enhance long-term durability
- Extend the lifespan of the concrete surface
When combined with a well-prepared base and quality concrete mix, reinforcement contributes to a stronger, longer-lasting installation.
Step 6: Pouring the Concrete
With the site prepared, forms secured, and reinforcement in place, the next stage is pouring the concrete. This is where the residential concrete installation process becomes highly time-sensitive.
Concrete begins to hydrate as soon as water is mixed with cement, so experienced crews work efficiently to place, spread, and level the material before it starts to set.
Depending on the project, concrete may be delivered by ready-mix truck and discharged directly into the forms or transferred using chutes, wheelbarrows, or a concrete pump for areas with limited access.
Professional installers focus on maintaining:
- Consistent placement
- Proper slab thickness
- Uniform distribution
- Minimal segregation of aggregates
- Continuous workflow
Interruptions during pouring can create weak points known as cold joints, which may affect the finished appearance and long-term durability.
Weather Matters More Than Many Homeowners Realize
Ontario weather has a major impact on residential concrete installation.
High temperatures can cause concrete to lose moisture too quickly, while cold temperatures slow curing and may even damage fresh concrete if freezing occurs before adequate strength develops.
Professional contractors plan pours around weather conditions and may use techniques such as:
- Scheduling early morning pours during summer
- Protecting fresh concrete from rain
- Using curing blankets during cooler months
- Adjusting the concrete mix when necessary
Careful weather planning helps produce stronger, more consistent results.
Step 7: Leveling and Surface Finishing
After placement, the concrete is leveled using specialized tools to create a smooth, even surface.
This stage of residential concrete installation determines both appearance and functionality.
The finishing process typically includes:
- Screeding to remove excess concrete
- Floating to smooth the surface
- Edging around borders
- Joint installation
- Final surface texture
Each step must be completed at the right time as the concrete gradually hardens.
Rushing or delaying finishing can reduce surface quality and create cosmetic imperfections.
Choosing the Right Finish
Different projects require different finishes.
| Finish Type | Best For | Benefits |
| Broom Finish | Driveways, sidewalks | Excellent slip resistance |
| Smooth Finish | Garage floors | Easy cleaning and modern appearance |
| Exposed Aggregate Driveway | Driveways, patios | Decorative and durable |
| Stamped Concrete Patio | Patios, pool decks | Mimics stone, brick, or slate |
| Trowel Finish | Indoor slabs | Smooth, dense surface |
Selecting the right finish depends on how the area will be used, maintenance expectations, and overall design preferences. Our Decorative Concrete Finishes include stamped concrete, exposed aggregate, coloured concrete, and custom textures that enhance curb appeal while maintaining long-term durability.
Step 8: Installing Control Joints
One of the biggest misconceptions about concrete is that it should never crack.
In reality, almost all concrete develops small cracks as it shrinks during curing.
The goal of residential concrete installation isn’t to eliminate cracking completely—it’s to control where cracks occur.
Control joints create intentional weak points that encourage concrete to crack in predictable locations instead of randomly across the surface.
Professionally placed joints help:
- Improve appearance
- Reduce random cracking
- Simplify future maintenance
- Extend service life
Joint spacing varies depending on slab dimensions, thickness, and project design.
Step 9: Proper Curing
Many homeowners think concrete is finished once it looks dry.
In reality, curing is one of the most important stages of residential concrete installation.
Concrete gains strength through hydration—not by simply drying out. The Portland Cement Association explains how proper curing improves concrete strength, durability, and long-term performance.
Proper curing helps:
- Increase strength
- Improve durability
- Reduce shrinkage cracks
- Enhance abrasion resistance
- Improve freeze-thaw performance
Although the surface may appear dry within hours, concrete continues gaining strength for approximately 28 days.
Typical Concrete Curing Timeline
| Time After Pour | What Happens |
| 24–48 Hours | Light foot traffic may be possible |
| About 7 Days | Significant strength has developed |
| Around 28 Days | Concrete reaches most of its design strength |
Following contractor recommendations during this period helps protect your investment.
Step 10: Sealing the Concrete
While not every project requires immediate sealing, applying a quality concrete sealer offers long-term protection.
For homeowners in Kitchener, Waterloo, Cambridge, and Guelph, sealing is especially valuable because concrete is regularly exposed to:
- Snow
- Ice
- Road salt
- Rain
- UV exposure
- Freeze-thaw cycles
A quality sealer can help:
- Reduce moisture penetration
- Minimize staining
- Improve color retention
- Make cleaning easier
- Extend the surface’s lifespan
Periodic resealing is generally recommended based on the type of finish and level of exposure.
Quality Checks Before the Project Is Complete
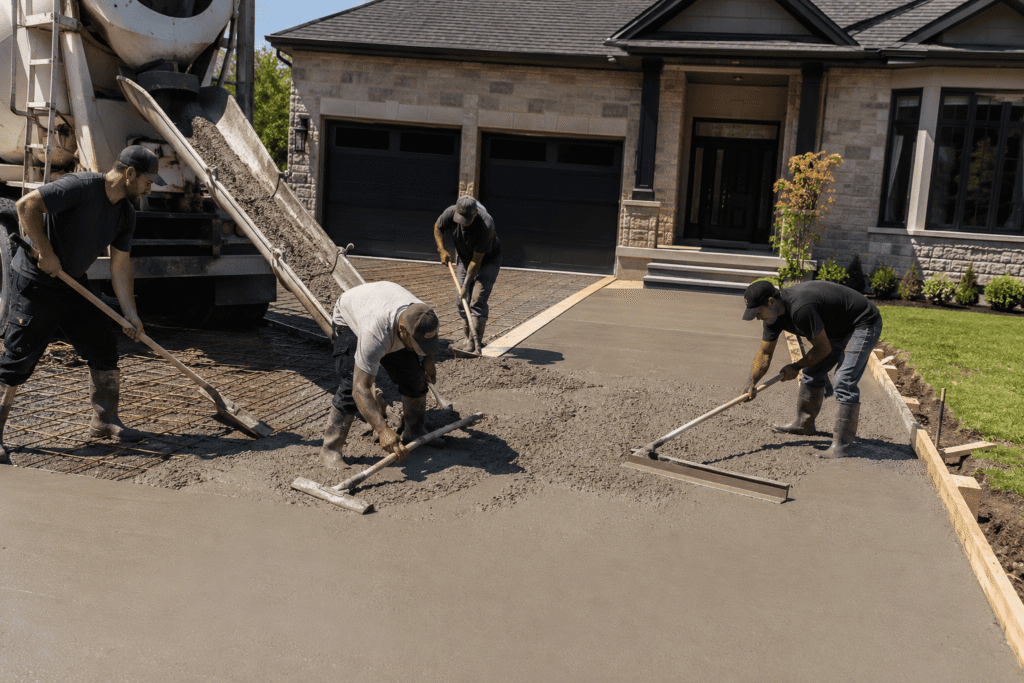
Professional contractors don’t simply finish pouring and leave.
A quality residential concrete installation should include a final inspection to verify that the project meets expectations.
Items commonly reviewed include:
- Surface consistency
- Proper slope and drainage
- Edge quality
- Joint placement
- Finish texture
- Thickness requirements
- Overall workmanship
Addressing small issues early helps prevent larger problems in the future.
Common Mistakes During Residential Concrete Installation
Many concrete problems can be traced back to shortcuts taken during installation rather than the concrete itself.
Some of the most common mistakes include:
Poor Base Preparation
An unstable base increases the risk of settlement, uneven surfaces, and cracking.
Incorrect Water Content
Adding excess water may make concrete easier to place, but it can reduce strength and increase shrinkage.
Ignoring Drainage
Improper grading allows water to collect on the surface, accelerating deterioration. Existing sidewalks that have settled or cracked may require professional Concrete Sidewalk Repair before installing adjacent concrete surfaces.
Skipping Reinforcement
Large slabs without appropriate reinforcement may experience wider or more noticeable cracking over time.
Poor Timing During Finishing
Finishing concrete too early or too late can weaken the surface and affect its appearance.
Inadequate Curing
Failing to cure concrete properly reduces long-term durability and increases the likelihood of surface defects.
Avoiding these mistakes is one reason experienced installers consistently deliver better long-term results.
Residential Concrete Installation in Kitchener and Surrounding Areas
Concrete projects in Southern Ontario face unique environmental challenges. The Cement Association of Canada provides information about concrete performance in Canadian climates, including durability considerations for freeze-thaw environments.
Local contractors understand how regional conditions influence installation techniques and material selection.
These include:
- Frequent freeze-thaw cycles
- Heavy spring rainfall
- Snow and ice removal
- Road salt exposure
- Variable soil conditions
- Temperature fluctuations throughout the year
Planning for these factors during residential concrete installation helps homeowners achieve a surface that remains attractive and structurally sound for many years.
How to Prepare Before Your Concrete Project Begins
A little preparation can help the installation process go more smoothly.
Before work starts, homeowners should:
- Remove vehicles from the work area.
- Clear outdoor furniture and decorations.
- Trim nearby shrubs or low branches if necessary.
- Keep children and pets away from the construction zone.
- Discuss drainage concerns with the contractor beforehand.
- Confirm curing timelines and when the surface can safely be used.
Being prepared minimizes delays and helps ensure a successful installation.
Why Hiring Experienced Professionals Makes a Difference
Concrete may seem straightforward, but achieving long-lasting results requires knowledge, planning, and attention to detail.
Experienced professionals understand:
- Local soil conditions
- Proper site preparation
- Reinforcement techniques
- Mix selection
- Finishing methods
- Weather considerations
- Local building practices
These factors work together to produce concrete surfaces that not only look great but also perform well for decades.
Planning a Concrete Project?
Every property is different, and the right installation approach depends on your soil conditions, drainage, and intended use. If you have questions about your upcoming project, contact our team for personalized recommendations and a free estimate.
Build It Right the First Time
Every successful residential concrete installation starts with proper planning and skilled workmanship. Whether you’re replacing an aging driveway, adding a backyard patio, or installing a new walkway, investing in quality installation today can help reduce maintenance and repair costs in the future.
If you’re planning a residential concrete installation project in Kitchener, Waterloo, Cambridge, or Guelph, the team at PurePour Concrete Inc. can evaluate your property, recommend the right solution, and provide expert craftsmanship tailored to Ontario’s climate.
Request a consultation to discuss your project goals and receive professional guidance before construction begins.
Frequently Asked Questions (FAQs)
1. How long does residential concrete installation take?
Most residential concrete installation projects, including driveways, patios, sidewalks, and walkways, take 1–3 days to complete, depending on the project’s size, weather conditions, and site preparation requirements. While installation is relatively quick, concrete continues curing for approximately 28 days before reaching most of its design strength.
2. When can I walk or drive on newly installed concrete?
After a residential concrete installation, light foot traffic is usually safe after 24–48 hours, depending on weather conditions and the concrete mix. For vehicles, contractors generally recommend waiting at least 7 days, while the concrete reaches its full design strength after about 28 days.
3. Does new concrete always crack?
Concrete naturally shrinks as it cures, so minor cracks can develop over time. A high-quality residential concrete installation minimizes the risk of uncontrolled cracking through proper site preparation, a stable base, reinforcement, and strategically placed control joints that allow the concrete to expand and contract safely.
4. Is sealing concrete necessary?
Although sealing isn’t always required immediately after a residential concrete installation, applying a high-quality concrete sealer helps protect the surface from moisture, stains, road salt, UV exposure, and freeze-thaw damage. Regular sealing is especially beneficial in Southern Ontario, where changing weather conditions can significantly impact the long-term durability of residential concrete surfaces.
5. What weather is best for pouring concrete?
Moderate temperatures with minimal rain are ideal. Extremely hot, cold, or wet conditions can affect curing and surface quality, which is why experienced contractors carefully monitor weather forecasts before scheduling a pour.
Choose a contractor with proven experience in residential concrete installation, transparent pricing, positive customer reviews, and a portfolio of completed projects. They should use quality materials, follow proper site preparation and drainage practices, and clearly explain every stage of the installation process before work begins.
7. How thick should residential concrete be?
The ideal thickness depends on the type of residential concrete installation. Most patios, sidewalks, and walkways require about 4 inches of concrete, while residential driveways and garage floors typically need 5–6 inches to support vehicle traffic. A qualified contractor can recommend the appropriate thickness based on soil conditions, drainage, and expected loads.
8. Can residential concrete installation be completed in cold weather?
Yes, residential concrete installation can be completed in cold weather, but it requires specialized techniques to ensure proper curing. Professional contractors may use heated materials, insulated curing blankets, or cold-weather concrete mixes to protect the concrete from freezing and achieve long-lasting results. Whenever possible, scheduling the project during favorable weather conditions provides the best outcome
9. How long does a residential concrete driveway or patio last?
A professionally completed residential concrete installation can last 25 to 40 years or more with proper maintenance. The lifespan depends on several factors, including site preparation, concrete quality, reinforcement, drainage, sealing, routine maintenance, and the local climate. Choosing an experienced contractor is one of the most important factors in maximizing the durability of your concrete surfaces.
10. How can I maintain newly installed residential concrete?
Proper maintenance is essential to protect your residential concrete installation and maximize its lifespan. Follow these best practices:
- Avoid placing heavy loads on the concrete during the initial curing period.
- Clean the surface regularly to remove dirt, leaves, and debris.
- Reseal the concrete every few years if recommended by your contractor.
- Avoid using harsh de-icing chemicals during the first winter, as they can damage newly cured concrete.
- Repair small cracks promptly to prevent moisture infiltration and freeze-thaw damage.
With routine maintenance and proper care, a professionally completed residential concrete installation can remain durable, attractive, and structurally sound for decades.aintenance helps preserve the appearance, strength, and durability of your residential concrete for many years.
Conclusion
A successful residential concrete installation is about much more than pouring concrete. Every stage—from planning and excavation to reinforcement, finishing, curing, and sealing—plays a vital role in creating a durable surface that will perform for decades.
For homeowners in Kitchener, Waterloo, Cambridge, and Guelph, proper installation is even more important due to Ontario’s freeze-thaw cycles, changing weather conditions, and varying soil types. Choosing experienced professionals who understand these local challenges helps protect your investment and reduces the likelihood of costly repairs in the future.
Whether you’re installing a new driveway, patio, walkway, garage floor, or concrete slab, our Residential Concrete Installation Services are designed to deliver durable, high-quality results built for Ontario’s climate.
While this guide focuses on residential projects, businesses and property managers can also explore our Commercial Concrete Slabs services for warehouses, commercial buildings, and industrial facilities.
Ready to Start Your Concrete Project?
If you’re planning a residential concrete installation in the Kitchener-Waterloo region, PurePour Concrete Inc. is committed to delivering high-quality craftsmanship, reliable service, and long-lasting concrete solutions tailored to your property.
Contact PurePour Concrete Inc. today to schedule your free consultation and receive a customized estimate for your residential concrete installation project in Kitchener, Waterloo, Cambridge, or Guelph.